


Importing NRD2 Data Feed to AWS S3
The intention of this document is to show you the basics of how to download the WhoisXML API's NRD2 data feed provided by WhoisXML API to an AWS S3 bucket by leveraging a serverless Lambda function. AWS Lambda functions act as a serverless compute service that allows you to write and execute code without provisioning or managing servers. AWS S3 is an object storage service for storing and retrieving files. This document will guide you through the process of configuring both AWS Lambda and an AWS S3 bucket.
Out of scope:
- Scheduling a Lambda function
- ETL pipelining
- Importing the python requests module
- Advanced Security
- Clean-up, life cycle file management
Prerequisites
Please ensure you have the following setup:
- AWS Account
- Basic to Intermediate knowledge of AWS services, specifically AWS Lambda and S3
- Some familiarity with Python which will be used in the Lambda function
- Access to the WhoisXML API's NRD2 data feed. In this example, we will be using the NRD2 Ultimate:Simple files. You will need an API key with access to the data feed. Please contact us for more information. For more information on the NRD2 specifications, please visit here.

Step 1: Create an AWS S3 Bucket
The first step is to create an S3 bucket to write the NRD2 file to.
- In the AWS Management Console, navigate to the S3 service.
- Click on “Create Bucket”.
- Give the bucket a unique name and select the appropriate region.

- At this time, leave the default settings and go ahead and click “Create Bucket”.
Step 2: Create an IAM Role
AWS Lambda will require an IAM role with the permissions necessary to read/write to the S3 bucket. Please follow these steps to create an IAM role:
- Navigate to the IAM Service in the AWS management console.

- Click on “Roles” and then followed by “Create Role”.
- Select “Lambda” as the service for this role, and then click “Next: Permissions”.

- In the input search bar, type “S3” and then select “AWSS3FullAccess” followed by “Next: Tags”.

- Tags are optional, then click “Next: Review”.
- Give your Role and name and provide a brief description, followed by “Create Role”.
Step 3: Creating a Lambda Function
Now the magic begins. Creating Lambda functions is fun, and easy. To create a Lambda function:
- Navigate to the Lambda service in the AWS management console.
- Click on “Create Function”.
- Provide your function with a descriptive name and select Python as the runtime. Then choose the IAM role you created in step 2 above.
- Click on “Create function”.
Notes:
Setting the execution role:

Setting the time-out value for the Lambda function. In this case, I’ve set it to 3 minutes.

Step 4: Write the Lambda function to import the NRD2 .csv file to S3
The example Lambda function uses the python requests module, and you may need to import it as it is no longer part of Boto3. AWS provides vague documentation on how to do this, but various tech articles can be found on the Internet.
Example code:
The below python code provides the entry point for the lambda_handler function:
import os
import boto3
import sys
from datetime import datetime, timedelta
sys.path.append('pyrequests') #added for requests module
import requests
from requests.auth import HTTPBasicAuth

# Initialize the S3 client
s3_client = boto3.client('s3')

def download_nrd_file(url, s3_bucket, s3_key, authUserPass):

    chunk_size = 1024*1024

    try:
        # Download the binary file in chunks
        response = requests.get(url, stream=True, auth=HTTPBasicAuth(authUserPass, authUserPass))
        response.raise_for_status()

        # Create a temporary file to store chunks
        temp_file = '/tmp/temp_file'

        with open(temp_file, 'wb') as f:
            for chunk in response.iter_content(chunk_size=chunk_size):
                f.write(chunk)

        # Upload the binary file to S3 from the temporary file
        s3_client.upload_file(temp_file, s3_bucket, s3_key)

        # Clean up the temporary file
        os.remove(temp_file)

        return True
    except Exception as e:
        print(f'Error: {str(e)}')
        return False


def lambda_handler(event, context):
    # Calculate yesterday's date in YYYY-MM-DD format
    yesterday = (datetime.now() - timedelta(days=1)).strftime("%Y-%m-%d")

    # Define the URL of the CSV file you want to download
    nrd_url = f"https://newly-registered-domains.whoisxmlapi.com/datafeeds/Newly_Registered_Domains_2.0/ultimate/daily/{yesterday}/nrd.{yesterday}.ultimate_simple.daily.data.csv.gz"

    # Define your API Key here
    apiKey = "<YOUR_API_KEY"

    # Define the S3 bucket and object/key where you want to store the file
    s3_bucket = "nrd2"
    s3_key = f"nrd2-simple-{yesterday}.csv.gz"

    try:
        # Download the NRD2 file with basic authentication
        success = download_nrd_file(nrd_url, s3_bucket, s3_key, apiKey)

        print("Status code returned is ", str(success))

        if success:
            # Upload the NRD file to S3
            print(f"Uploading file to ", s3_bucket, s3_key)
            return {
                'statusCode': 200,
                'body': 'NRD2 file successfully downloaded and stored in S3'
            }
        else:
            bodyStr = f"Failed to download {nrd_url}"
            return {
                'statusCode': 500,
                'body': bodyStr
            }
    except Exception as e:
        return {
            'statusCode': 500,
            'body': str(e)
        }
When you’re done, you should have something that resembles this:

Step 5: Testing your new Lambda function
The last step is to test the Lambda function to ensure it can a) successfully retrieve the NRD2 file, and b) write it to the S3 bucket:
- Click on “Test” at the top of the page, and you should see something similar.

- If you receive the message “requests” module not found, then you need to set up the python requests library correctly, which is outside the scope of this document.
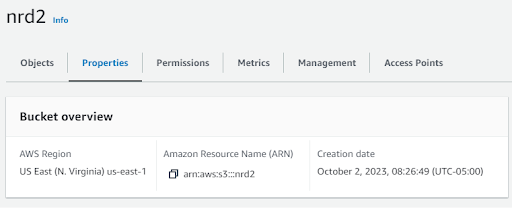
If your Lambda function is set up correctly, the function will retrieve the file, and write it to the S3 bucket. You can navigate to the S3 bucket to verify it’s there.

Conclusion
Configuring AWS Lambda with access to an S3 bucket is a common task for cloud engineers. After walking you through the process, the next step is to determine what you want to do with this data, such as import it into Athena, Postgres or MySQL database. If you’re not familiar with AWS Glue for ETL, be sure to check that out as well.